Road Handlebar Review
- Posted on
- By Fair Wheel
- Posted in Road Bike, Tech, Testing & Reviews
This is the 3rd test in our series, road handlebars. We’ve once again brought back our favorite engineer, Jason Krantz. Jason’s a mechanical engineer whose graduate work focused on the intersection of composite materials and finite element analysis. Jason has worked for several companies in the bicycle industry and never fails to amaze us with the depth of his cycling related knowledge. He adds real value to all of the tests we perform.
Why do deflection testing on bars?
We don’t believe that there is any efficiency to be gained through a stiffer handlebar, so why test for that? Losses in efficiency are minimal but a stiff handlebar and stem can make the bike feel especially responsive to rider inputs, especially out of the saddle. we’re unconvinced of any performance benefit to a stiffer bar, but many people like the feeling one provides. What we are convinced of is that the additive effect of parts that deflect more does at some point become a problem. The point at which it becomes a problem is different for different riders and terrains. Conversely, a flattened bar like the, Aerofly, Kwing, Metron, or Enve SES models will provide increased deflection (and therefore bump comfort) compared to a bar with a round cross-section. This may be desirable for gravel bikes or other builds where comfort is paramount.
If you combined a very flexible, frame, steerer, stem, bar etc… into one bike you’d more than likely notice a lack of confidence in it’s handling. If you mounted the most rigid pieces you could find in one bike many people would find a lack of comfort. The ideal is some moving sweet spot in between that is different for each given set of circumstance. The goal of this review is not to identify a “winner” as there is no ideal result just a comparison to help each rider identify which bar may best suit their given set of needs.
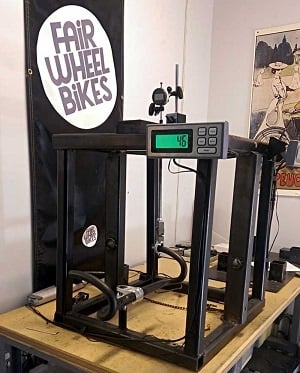
About the Testing Method
Each handlebar was mounted in the fixture and the testing performed 3 times and then averaged. All bars tested were as close to 44 cm as could be. Each bar was mounted with recommend torque specs and preloaded with 20 pounds of force applied in the drops. Once preloaded the equipment was zeroed and another 50 pounds of force was added and a measurement recorded. The measurement was taken at the point of load
Notes about the loads tested:
The actual load doesn’t matter because the response of the structure is linear. That is, a handlebar that deflects 2.5mm under a 25-lb load will deflect 7.5 mm under a 75-lb load, 10 mm under a 100-lb load and so forth. This assumption of a linear response to loads is valid roughly until an aluminum bar bends permanently (plastic deformation) or until a carbon bar breaks (brittle failure). These bars were loaded with 50 pounds because it’s a nice round number and a fairly realistic approximation of real-world conditions.
If a sprinting rider is pushing on the left pedal with 200 lbf (in other words, he can squat 400 lbs), he must create an equal and opposite moment (twisting force) via the handlebars. The pedal is about half as far from the frame centerline as the handlebar drops are, so it would take a reaction force of 100 lbs at the right-hand bar to counteract the pedaling force. This is the same as applying 50 lbf up on the one side of the bar and 50 lbf down on the other; the total moment is the same.
Stiffness to weight ratio (SWR):
This was calculated using =((1/avg. defl) / weight) * 1000
Reach / Drop / Flare
Notes about reach, drop and flare:One thing that has always bothered us is that there is no standard system for measuring reach and drop. Actual vs. claimed reach particularly can vary dramatically, in this test alone the bars range by almost 3 cm in Reach. 3cm can be the difference between needing a 9 cm or 12 cm stem, yet many people don’t consider reach on their bars when making a choice. We decided to level the field here by measuring them all to the same standard. With the drops horizontal to the ground the reach is measured from the center of the top (where the bar mounts into the stem) to the leading edge of the vertical drop (where the lever would mount). Drop is measured with the drops horizontal to the ground and from center to center. For some companies our measurements may match up with what is claimed, but for others it may differ significantly because the manufacturer used a different measurement method.
We have a separate listing for flare. Flare is how much wider a bar is at the drops than where the levers mount. For some bars the widths in the locations are the same, but for others they may be as much as 4 cm wider at the end of the drops.
Carbon Fiber vs Aluminum
While carbon offers little or no weight savings when applied to stems, the lightest handlebars are usually made from laminated fiber. Handlebars are stressed primarily in bending, and 0-degree carbon fibers take these loads very, very well. When you throw in a few layers at 45 degrees to deal with torsional loads and maybe some circumferential reinforcements where the levers mount, you often end up with a bar that’s a bit lighter than the equivalent aluminum bar.
As noted above, aluminum bars tend to fail by bending permanently (ductile failure) while carbon bars usually snap into pieces (brittle failure). While “shattered” carbon bars make for shudder-inducing post-crash photos, keep in mind that a strong carbon bar will shrug off loads that would bend its aluminum counterpart. Ductile failure is not necessarily a better failure mode than brittle failure.
Reduced weight is a wonderful thing, but carbon bars offer another advantage:
They tend to damp high-frequency vibration better than aluminum bars. Composite structures generally damp vibration better than metallic ones, and many riders have found real-world damping benefits when they fit a carbon handlebar. It would be interesting to quantify carbon bar damping; one way to do so would be to wire an accelerometer to the drops and then gently strike or pluck the bar, letting it “ring” at its natural frequency. One could then read the accelerometer data to see how quickly the vibrations dissipated. This ring-down test may be on the Fairwheel menu for a future article, but is outside the scope of this test.
Most bars are obviously similar in concept, but still very different in execution. Finding a bar that is comfortable to a rider involves personal preference as to the shape and depth of the drop as well as reach, flare, sweep and flex. Because of this we’re going to keep our opinions on fit and shape to a minimum, leaving those up to each individual to find what is right for them.
Now Onto the Results:
| Manufacturer | Model | Flare1 | Weight | Avg Deflection2 | SWR2 | Drop2 | Reach2 | Material |
| 3T | Ergonova | 1.5 | ~223g | 4.37 | 1.03 | 119 | 90 | Carbon |
| 3T | Aeronova Team | 1 | ~213g | 5.28 | 0.89 | 138 | 94 | Carbon |
| 3T | Ergosum | 1.5 | ~205g | 4.62 | 1.05 | 126 | 103 | Carbon |
| ControlTech | Formidable | 0 | ~321g | 4.22 | 0.74 | 152 | 93 | Alloy |
| ControlTech | Ti Mania | 0 | ~238g | 4.0 | 1.05 | 130 | 85 | Ti / Carbon |
| ControlTech | Tux | 0 | ~186g | 5.83 | 0.92 | 142 | 92 | Carbon |
| Deda | Newton Deep | 0 | ~274g | 3.9 | 0.93 | 137 | 106 | Alloy |
| Easton | E100 | 1 | ~180g | 4.13 | 1.34 | 120 | 86 | Carbon |
| Easton | EA70 | 1 | ~285g | 4.22 | 0.83 | 125 | 92 | Alloy |
| Easton | EC70SL | 1 | ~221g | 4.06 | 1.11 | 125 | 90 | Carbon |
| Easton | EC90SLX | 1 | ~199g | 4.27 | 1.18 | 125 | 90 | Carbon |
| ENVE | Aero | 4 | ~239g | 4.64 | 0.9 | 121 | 85 | Carbon |
| ENVE | Compact | 1.5 | ~202g | 4.52 | 1.09 | 121 | 88 | Carbon |
| ENVE | Standard | 2 | ~197g | 4.55 | 1.11 | 147 | 96 | Carbon |
| FSA | K-Wing Compact | 1 | ~240g | 5.43 | 0.77 | 125 | 89 | Carbon |
| Mcfk | Standard | 1.5 | ~172g | 4.56 | 1.28 | 112 | 77 | Carbon |
| New Ultimate | Evo | 0 | ~182g | 4.92 | 1.12 | 126 | 85 | Carbon |
| Pro | PLT | 0 | ~273g | 3.88 | 0.94 | 146 | 89 | Alloy |
| Pro | Vibe Carbon | 0 | ~236g | 2.99 | 1.41 | 127 | 91 | Carbon |
| Ritchey | WCS Carbon Logic2 | 1 | ~202g | 4.57 | 1.08 | 139 | 94 | Carbon |
| Ritchey | WCS Classic | 0 | ~239g | 4.25 | 0.99 | 133 | 90 | Alloy |
| Ritchey | WCS Logic2 | 0 | ~254g | 3.94 | 0.99 | 135 | 93 | Alloy |
| Schmolke | TLO | 0 | ~148g | 4.43 | 1.52 | 134 | 102 | Carbon |
| Schmolke | Full Over | 0 | ~158g | 3.11 | 2.03 | 133 | 86 | Carbon |
| Specialized | Aerofly | 0 | ~268g | 4.61 | 0.81 | 128 | 93 | Carbon |
| Vision | Metron 4D | 2.5 | ~240g | 4.57 | 0.91 | 125 | 89 | Carbon |
| Zipp | SL | 0 | ~178g | 5.45 | 1.03 | 148 | 102 | Carbon |
| 1 - measured in cm | ||||||||
| 2 - measured in mm | ||||||||
A Few Graphs for Your Viewing Pleasure


Handlebar Specs
3T Aeronova
|
3T Ergonova
|
3T Ergosum
|
ControlTech Formidable
|
ControlTech Ti Mania
|
ControlTech Tux
|
Deda Newton
|
Easton EA70
|
Easton EC70SL
|
Easton EC90SLX
|
Easton E100
|
ENVE SES
|
ENVE Compact
|
ENVE Standard
|
FSA K-Wing
|
MCFK
|
New Ultimate
|
Pro PLT
|
Shimano Pro Vibe Carbon
|
Ritchey WCS Carbon Logic2
|
Ritchey WCS Classic
|
Ritchey WCS Logic2
|
Schmolke TLO
|
Schmolke Full Over
|
Specialized Aerofly
|
Vision Metron 4D
|
Zipp SL
|


Disclaimer: A lot of typing and numbers have gone into this article and we apologize in advance for any typos, but would warn that the possibility of mistakes is present.